Table of Contents
ToggleBaby gates are an essential childproofing tool that every parent should consider.
They serve as a safety barrier, restricting your baby’s access to potential hazards.
Deciding where to put baby gates in your home can be a challenging endeavor as it largely depends on your home’s layout and your child’s mobility.
This guide will help you navigate through the process and make informed decisions.
Short Answer of Where to Put Baby Gates?
The placement of baby gates primarily depends on the layout of your home and your baby’s mobility.
Typically, they should be installed in areas with potential hazards such as staircases, kitchens, and bathrooms.
Furthermore, any rooms with delicate items or equipment should also be gated off.
Remember, the goal is to create a safe space where your baby can explore freely.
Begin with the Basics - Where Are Baby Gates Commonly Used and Why Are They Necessary for Safety Purposes?
Baby gates are commonly used in areas where children may be at risk, and their necessity can not be overstated. Often, they’re found at the top and bottom of stairs to prevent falls, a leading cause of child injuries. Staircases can prove to be dangerous for a curious and mobile child; hence, installing a gate can provide a much-needed safety barrier.
In the kitchen, baby gates help keep children away from potentially harmful objects and substances. Alongside sharp utensils and hot surfaces, kitchens often house cleaning agents that can be harmful if ingested. Therefore, restricting access to this area is crucial for your child’s safety.
Bathrooms are another common location for baby gates. With slippery floors, sharp edges, and often chemicals or medicines, they can be quite perilous for a young child. A gate at the entrance can keep your child safe from these potential hazards.
Apart from these areas, you should consider installing baby gates in rooms housing delicate items, electronics, or heavy furniture that could tip over. The goal is to create an environment where your child can safely explore without the risk of injury.
Here are some critical points to remember:
- Always measure the areas where you intend to install the gates to ensure a snug and secure fit.
- Opt for hardware-mounted gates at the top of the stairs for added safety.
- Regularly check the gates for any wear and tear.
- Remove the gates once your child is old enough to navigate safely around the house.
What are the Best Places to Put a Baby Gate in Your Home?
Based on your home’s layout and your child’s mobility, some specific areas in your home are prime candidates for installing baby gates:
- Staircases: As mentioned earlier, staircases are a common area for using baby gates. Both the top and bottom of the staircases can pose a risk, so it’s crucial to install gates in both locations.
- Kitchens: Kitchens can be a hotbed of potential hazards, from hot surfaces to sharp utensils and harmful cleaning agents. A baby gate at the entrance to your kitchen can keep your little one safe.
- Bathrooms: Bathrooms can also pose risks with slippery floors and access to potentially harmful substances. A gate can restrict access and keep your child safe.
- Home Office: If you have a home office filled with electronics and cables, it would be wise to install a baby gate at the entrance to prevent your child from wandering in.
- Fireplaces: If you have a fireplace, installing a baby gate around it can prevent your little one from getting too close to the flames or sharp edges.
- Laundry Rooms: These rooms often have detergents and other cleaning supplies that can be harmful if ingested. It’s best to gate off this area as well.
Remember to regularly check the condition of your baby gates to ensure they continue to provide a reliable barrier. Also, consider your child’s growth and development, as there might come a time when the gates are no longer necessary and can be safely removed.
Look at Your Home’s Layout and Decide Where Baby Gates Would Be Most Beneficial?

Your home’s layout plays a pivotal role in determining where baby gates would be most beneficial. The goal is to create a safe, exploratory environment for your child while minimizing the risk of accidents.
Start by assessing each room and space in your home. Are there any potential hazards such as stairs, sharp objects, heavy furniture that can tip over, or areas where harmful substances are stored? These are prime locations for baby gates.
However, remember that placing a gate does not substitute for active supervision; it merely adds an extra layer of protection.
Based on the layout, you might also want to establish certain areas where your child can play freely.
These “safe zones” can be gated to confine your child’s play area, ensuring their safety while giving them the freedom to explore.
Determining the number of baby gates you need can be a bit tricky. As a starting point, this article on how many baby gates do you need provides a comprehensive guide to help you make an informed decision.
It factors in elements such as your home’s design, the number of hazardous areas, and your child’s age and mobility.
Remember, every home and situation is unique. What works for one may not work for another.
The key is to assess your own home and needs, take measurements, and then choose the baby gates that best fit your circumstances.
Learn About the Different Types of Baby Gates and What Applications They Are Best Suited?
There are various types of baby gates available in the market, and each type is suited for specific applications:
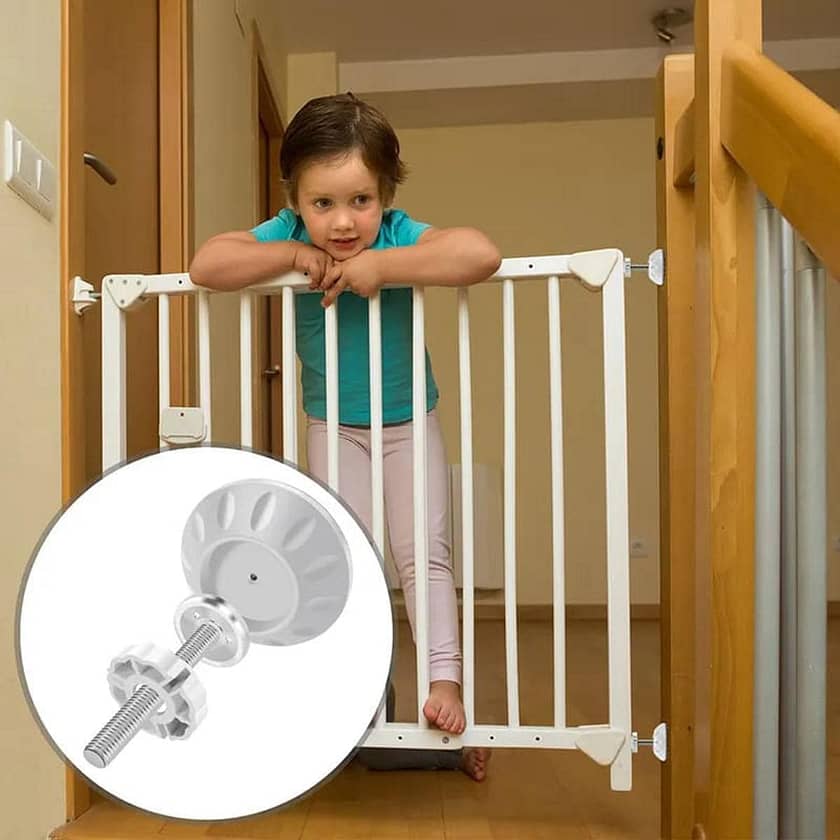
- Hardware-mounted gates: These gates are permanently installed by screwing them into the framing inside the walls of your home. They are incredibly sturdy and are ideal for placing at the top of stairs or other high-risk areas. Learn more about hardware-mounted gates here.
- Pressure-mounted gates: These gates are wedged into place by pressure against the walls or door frame. They are easy to install and remove and are best suited for level areas, but should not be used at the top of stairs. For more details, visit this page.
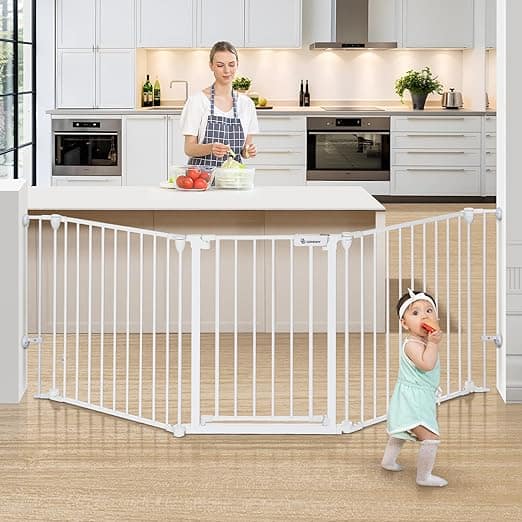
- Free-standing gates: These gates stand on their own and can be used to block off an area of the house, such as around a fireplace, or to create a play area. Visit this link for more information.
- Retractable gates: These gates can be pulled out or rolled back when not in use, making them very convenient and less conspicuous. Read more about retractable gates here.
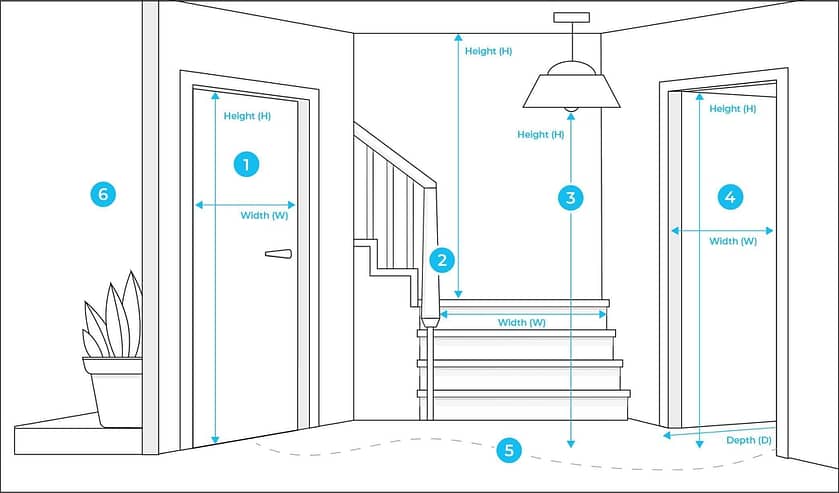
It’s essential to note that while baby gates are designed to fit most doorways or openings, they are not necessarily universal.
This is due to the wide range of doorway sizes and the varying installation methods of different gates. Always measure your doorway or opening before purchasing a baby gate. For more information on this, visit this page.
Remember, every baby gate has its pros and cons, and the best one for you will depend on your individual needs and home layout. Always prioritize safety and ensure the gate meets safety standards.
Find Out How to Install Baby Gates Properly to Ensure Maximum Safety:
Installing baby gates properly is key to ensuring they serve their purpose of creating safe zones for your child.
The method of installation may vary depending on the type of gate you choose, so it’s essential to follow the manufacturer’s instructions closely.
Generally, the installation of hardware-mounted gates involves using screws to secure the gate in place, making them extremely reliable and ideal for high-risk areas like the top of the stairs.
On the other hand, pressure-mounted gates are installed by applying pressure to both sides of the gate against a wall or doorway.
They’re simpler to install and remove without leaving any marks, but they’re not recommended for use at the top of the stairs due to the risk of toppling over.
Ensure the gate is leveled correctly and the locking mechanism works efficiently.
Check that there are no sharp edges or points that could potentially harm the child.
Regardless of the type of gate, safety should be your number one priority.
It’s also recommended to perform regular checks to ensure the gate remains secure over time.
If you’re unsure or need a guide on how to install baby gates, this comprehensive guide from Baby Gates Reviews provides a detailed, step-by-step process for installing different types of baby gates.
How to Install Baby Gates Without Drilling Holes in Walls?

Installing baby gates without drilling holes in your walls is indeed possible and can be a preferred option if you want to avoid making permanent marks on your walls.
One solution is to opt for pressure-mounted gates, which use tension to stay in place.
However, they should be used with caution as they are less stable than hardware-mounted gates and should not be used at the top of stairs.
Another option could be freestanding gates, which provide flexibility and portability.
A few manufacturers also offer installation kits that allow you to mount gates on stair banisters without drilling.
Always remember, safety is paramount. Don’t compromise on the stability and reliability of the gate in an attempt to avoid drilling.
If you want to know do baby gates have to be drilled? visit this page.
Get Creative with Your Design Choices – Matching Colors & Styles with Your Home’s Decor:
Just because baby gates serve a practical purpose doesn’t mean they can’t be aesthetically pleasing too.
Baby gates come in a variety of styles, materials, and colors, so you can choose one that complements your home decor.
Here’s how you can match your baby gates with your home’s style and color:
- Color Match: Baby gates come in a range of colors. Choose a color that complements your walls, furniture, or overall color scheme. For example, if your decor is predominantly white, a white baby gate will blend in seamlessly.
- Style Selection: The market offers baby gates in diverse styles – from minimalist to ornate. If your home has a modern look, a sleek, simple gate might be a good fit. On the contrary, a home with classic decor might benefit from a gate with a more traditional design.
- Material Choice: The material of the baby gate should also align with your home’s aesthetic. For instance, if your home features a lot of wooden elements, a wooden baby gate would be a good fit. If your home has a more industrial vibe, consider a metal or wrought iron gate.
- Design Elements: Some gates come with design elements like arches or decorative bars. These can add to the aesthetic appeal of your home, especially if they match other design elements in your home.
Remember, safety should always come first, so make sure that your design choices do not compromise the functionality and safety features of the baby gate.
Conclusion:
Ensuring the safety of your little one is paramount, and baby gates play a crucial role in creating a child-friendly environment.
By correctly identifying where to put baby gates, you can effectively prevent accidents and provide your child with a safe space to explore.
Whether you choose hardware-mounted, pressure-mounted, free-standing, or retractable gates, consider your home’s layout and your specific needs.
Opt for a gate that not only meets safety standards but also complements your home’s decor.
Be sure to install your gate correctly, following the manufacturer’s directions, and don’t hesitate to get creative in integrating it into your home’s aesthetic appeal.
Above all, remember to regularly check the stability of the gate to ensure consistent safety for your child.
A well-chosen, well-positioned, and well-maintained baby gate can give you peace of mind as your child grows and explores.


2 thoughts on “Where to Put Baby Gates? The Ultimate Guide”